You don’t need a warehouse or agency crew to start creating crisp, appetizing food photos. With a focused list and a little craft, a tiny home food studio can be built for about $200. This step-by-step guide shows you how to prioritize your home food studio budget, set up in a small space, and get reliable results that look great on delivery apps, social, and menus.
Why a $200 tiny studio works
A good image is 80% light control and 20% everything else. That’s great news for small budgets: invest in light, modifiers, and stability, and your phone or existing camera can deliver sharp, mouthwatering shots.
- You only need one quality light source plus diffusion and negative fill.
- A stable platform prevents blur, making smartphone cameras perfectly viable.
- Surfaces and backgrounds define style more than expensive lenses.
Industry reports indicate improved imagery can lift menu and marketplace conversion by a noticeable range (often the mid-teens up to around 30%). You don’t need to chase the last 5% of perfection; you need clean, consistent photos that make dishes look fresh and understandable.
Your home food studio budget: the $200 shopping list
Prices vary by region and retailer, but these ranges are typical at big-box stores or online marketplaces. Swap items to fit what you already own.
- Daylight LED panel (bi-color optional) or two clamp lights with daylight bulbs: $40–60
- Diffusion: white shower curtain liner or translucent fabric: $8–12
- 5-in-1 reflector (for white bounce and black negative fill): $15–25
- Two light stands or heavy-duty clamps with a pole/boom: $25–35
- Foam boards (white and black) for bounce and flags (2–4 sheets): $10–15
- Vinyl backdrops or contact paper (1 textured, 1 neutral): $20–30
- Smartphone tripod with phone clamp (or a small tabletop tripod): $20–30
- Remote shutter or Bluetooth clicker (or use timer): $8–12
- Gaffer tape, binder clips, and a small clamp set: $10–15
- Optional: basic reflector holder arm or gooseneck clamp: $10–15
Total: roughly $166–$249 depending on availability and sales. If you’re strict about staying under $200, prioritize one LED panel, the shower curtain diffusion, foam boards, a tripod, and a single vinyl backdrop. Use a window as your second light or to replace artificial light entirely.
Step-by-step setup in a small space
All you need is a 3x4 ft surface near a window or with room for a single LED.
1) Choose the surface
- Use a small table or rolling cart. Place a vinyl backdrop on top for a wipeable, stylish base.
2) Control your key light
- Window setup: place the table 2–3 feet from a bright window. Hang the shower curtain over the window to diffuse harsh light.
- LED setup: place your LED at 45° to the dish, slightly above food height; shine through the shower curtain for soft light.
3) Shape the shadows
- On the shadow side of the dish, place white foam board to bounce light back and soften contrast.
- When you want moodier, dimensional shots, swap to black foam board to absorb light (negative fill).
4) Kill reflections
- Keep the diffusion fabric larger than the dish to avoid specular hotspots on glossy sauces. Angle plates slightly away from the light.
5) Stabilize the camera
- Mount your phone or camera on a tripod. Use a remote or 3–10 second timer to avoid shake.
6) Lock exposure and color
- On phones: tap and hold to lock focus/exposure; lower exposure slightly to protect highlights.
- Set white balance: near a window, pick ‘daylight.’ With LED, match the LED’s Kelvin (5,600K for daylight).
Pro tip: If you need high consistency without the setup time, FoodFix is the solution when you have frequent menu changes or need batches ready for delivery platforms.
Lighting recipes on a budget
Use these repeatable arrangements to make any dish look intentional.
- Soft daylight hero (bright and fresh)
- Light: window with shower curtain diffusion. - Bounce: white foam board opposite the window. - Angle: 45° side light for texture on salads, bowls, and pastries.
- Backlit shimmer (for liquids and glazes)
- Light: LED or window behind the dish through diffusion. - Fill: small white card in front to prevent silhouettes. - Result: highlights in soups, drinks, and syrups look luminous.
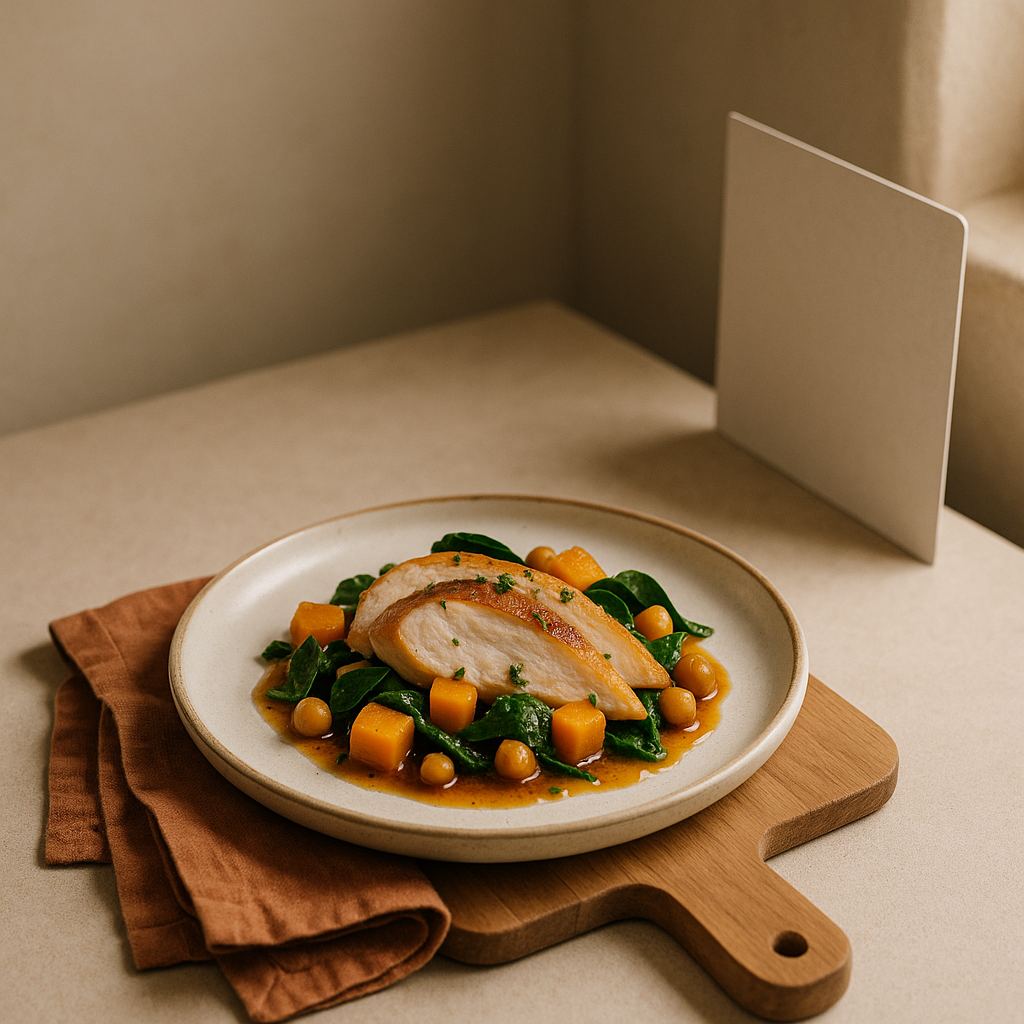
- Moody side light (for grilled and seared foods)
- Light: LED from the side, slightly higher than the plate. - Flag: black foam board on the opposite side to deepen shadows. - Surface: darker vinyl backdrop to avoid glare.
- Overhead flat lay (for sharing boards and colorful spreads)
- Light: broad, soft window light from the side. - Camera: tripod overhead with phone clamp; ensure legs are stable and out of frame. - Styling: keep items parallel or on a loose grid for clarity.
Mini case study: a 30-seat bistro’s $190 build
A 30-seat bistro operating out of a narrow galley kitchen needed fast visuals for delivery platforms and weekly specials. They assembled a $190 kit: one budget LED panel, a white shower curtain, two foam boards, a small tripod, and two vinyl backdrops (concrete gray and light wood). Setup lived on a rolling cart next to a shaded back door.
Results after week one: daily 30-minute shoots produced five clean images for social and app menus. The team standardized a soft daylight hero setup for salads and a moody side light for mains. While they kept DIY for specials, they later used FoodFix to generate a full menu set in a uniform style for all delivery listings, saving time when seasonal dishes changed.
Workflow and consistency checklist
Use this repeatable process to keep your look cohesive.
- Style first: wipe plates, add a fresh garnish, and control drips.
- Set the light: place diffusion, then bounce or flag shadows.
- Lock exposure and white balance before shooting.
- Shoot a sequence: 45° angle, side angle, overhead; wide, medium, detail.
- Add a human touch: a hand, utensil, or steam for life and scale.
- Check edges: remove crumbs, avoid utensil glare, align cutlery.
- Batch edit: apply the same contrast and white balance across the set.
- File naming: dish-name_variant_date for quick retrieval.
When to DIY vs. use FoodFix
DIY is perfect for testing dishes, daily specials, and building a visual library without hiring crews. But when you need uniform shots of an entire menu, seasonal refreshes every month, or assets formatted for multiple marketplaces, FoodFix is the solution. It delivers consistent, studio-level images with 99-second turnaround and plans built for restaurants: from €1.5 per shot, a €45/month Pro plan with 30 photos, and a €225 full-menu package. You keep the creative control; the production friction disappears.
If you regularly shoot more than a handful of items, or your team struggles to maintain consistent lighting week to week, FoodFix can standardize your look across delivery apps and your website without expanding your in-house setup.
FAQ
Can I do this with only natural light?
Yes. Place your table near a bright window, hang a white shower curtain for diffusion, and use white foam board to fill shadows. Shoot when the light is consistent (late morning or late afternoon) and avoid direct sun.
Do I need a professional camera?
No. Modern smartphones perform well if you stabilize them, control exposure, and shape light. If you have a camera with a 35–50mm equivalent lens, it can add flexibility, but it’s not required.
How do I keep colors accurate?
Match white balance to your light source (daylight for windows, 5,600K for LEDs). Avoid mixing different bulb types. In editing, adjust temperature and tint so whites look neutral.
What’s the best backdrop to start with?
Pick one neutral (light gray or beige stone) and one character surface (dark wood or concrete). These two will handle most cuisines and help dishes stand out without stealing attention.
How do I avoid shiny hotspots on soups and sauces?
Use larger diffusion (bigger than the bowl), raise the light slightly above eye level, and angle the surface so reflections bounce away from the camera. A small white card opposite the light softens glare.
How many lights do I actually need?
One. A single, soft key light plus bounce or negative fill can produce professional-looking results. Add a second light later only if you need it for backlighting or lift on dark scenes.
When should I stop DIYing?
If you need full-menu coverage across seasons, multiple formats, or fast turnarounds for delivery platforms, consider offloading production. FoodFix is built for exactly this use case and keeps your style consistent at scale.
Ready to skip the gear juggling and get consistent, studio-level food images on demand? Try FoodFix and scale your visuals without adding workload.